Desktop Testing Tutorial
What You Will Learn
- How to create a repository, test project and test module
- How to open a desktop application using
start programaction - How to capture the GUI controls of a desktop app using
Interface Viewer - How to quickly write your first test by simply drag-dropping interface elements on to the test module
- How to execute the test and review the test result
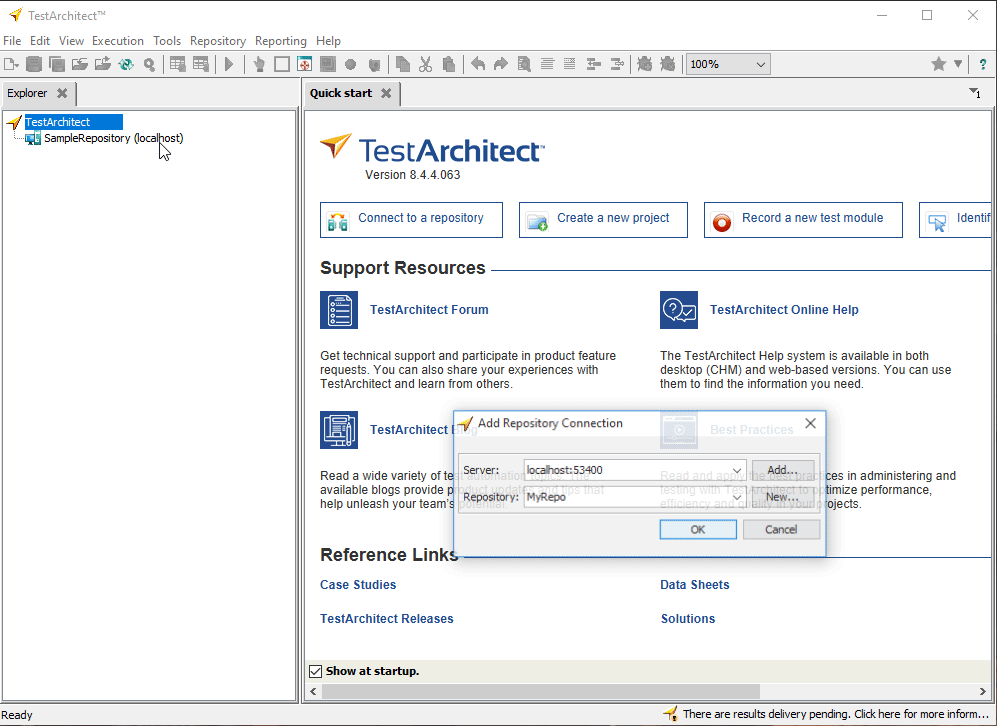
Create your own repository
- Open TestArchitect IDE
- Right click on the root node and select New Repository Connection
- Type in
MyDesktopTestas the new name for your repository
TIP
By default, a Repository Server instance will be installed on your local machine when you install TestArchitect. Therefore, localhost:53400 is always there for you to select. However, if you set up a remote Repository Server that can be shared with your team on a different machine, enter that machine's IP and the appropriate port into the Server field, e.g. 192.168.167.20:53400
- Log into the newly created repository
Now you have a brand new repository of your own. To learn more about TestArchitect repositories, check out this article.
Create your first test project
- Right click on the
MyDesktopTestrepository and select New Project - Fill in the name of your project, e.g.
FirstDesktopProject - Fill in the 3-char abbreviation for your project, e.g.
DES - Click Create
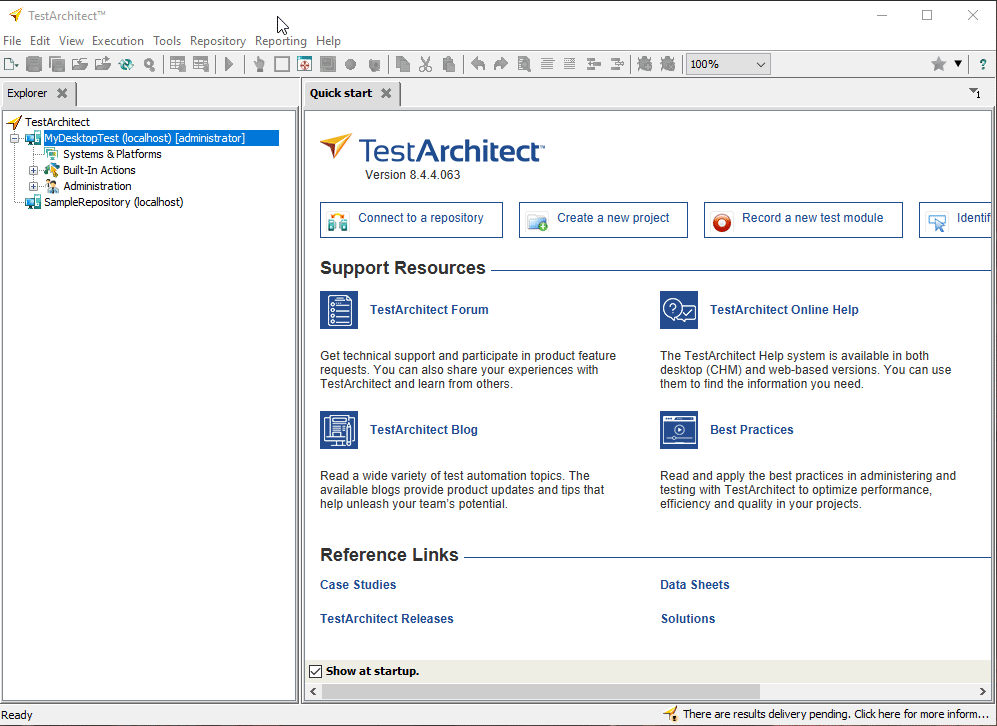
This project will be the central database to store all of your test assets later on.
Create a test module
- With TestArchitect IDE opened, log into the
MyDesktopTestrepository that you've created - Expand the
FirstDesktopProjectproject - Right click on the Tests node > Select New Test Module > Name your test module as
MyFirstTest
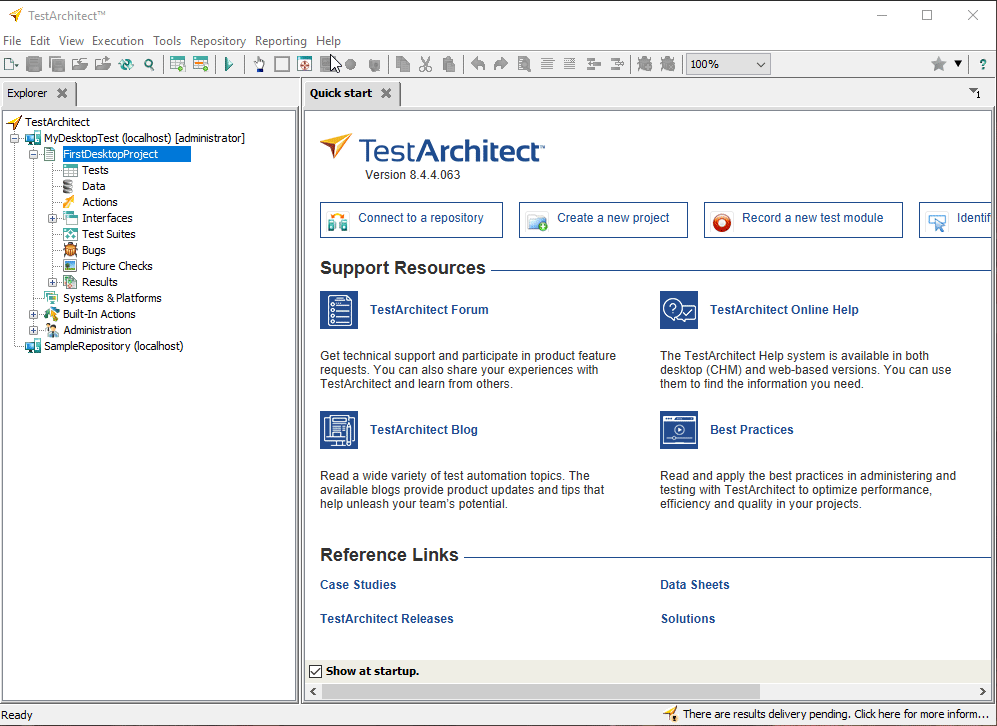
MyFirstTest test module will be our main test module of interest from now on.
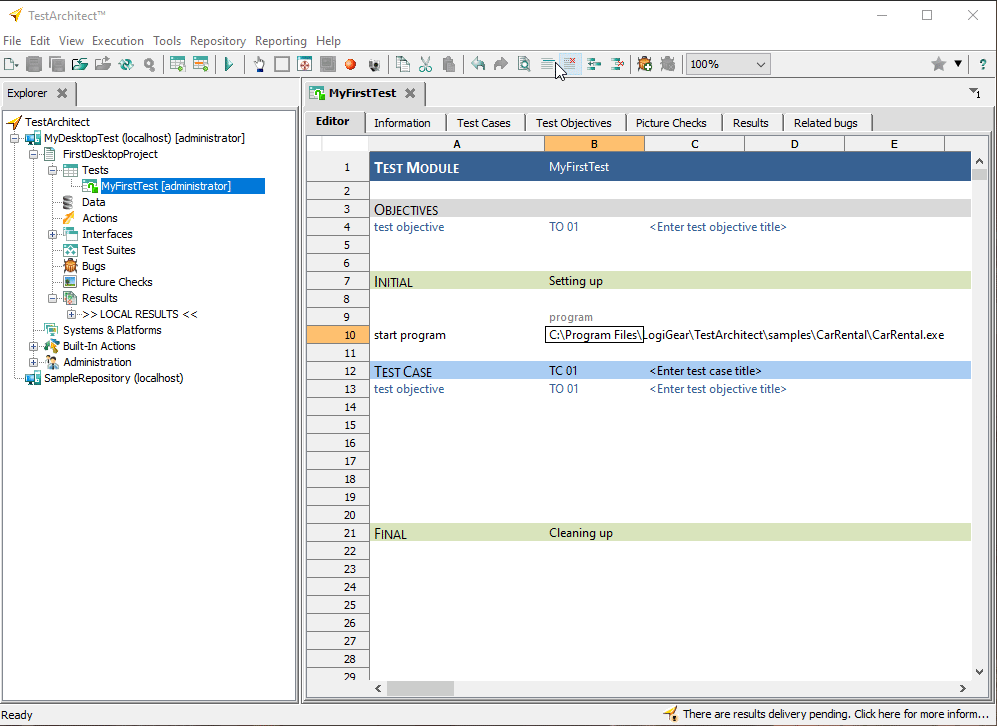
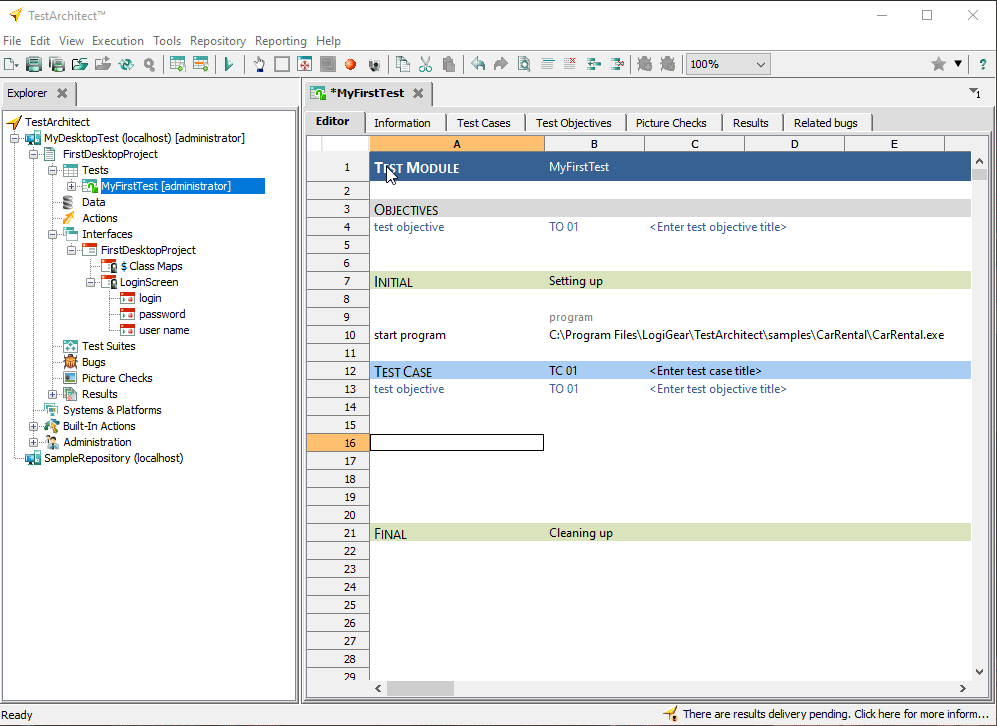
Start the sample desktop app
- Open the
MyFirstTesttest module you have just created - Use the
start programaction to open the Car Rental desktop app like below
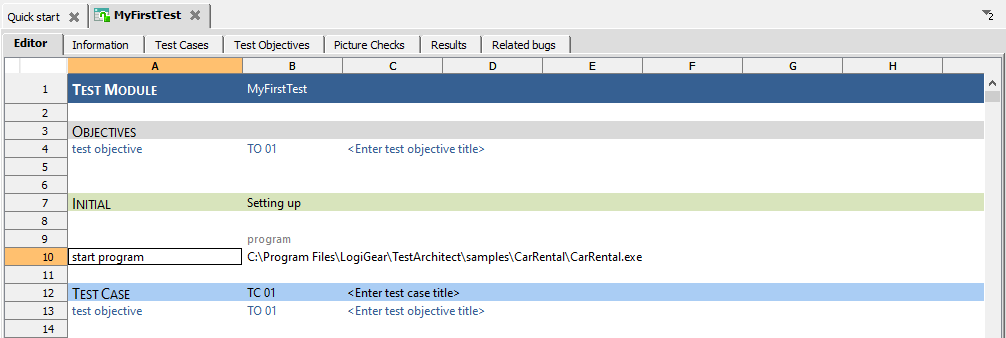
TIP
The Car Rental desktop app (Java-based) is shipped together with TestArchitect. It usually locates at: C:\Program Files (x86)\LogiGear\TestArchitect\samples\CarRental\CarRental.exe or C:\Program Files\LogiGear\TestArchitect\samples\CarRental\CarRental.exe.
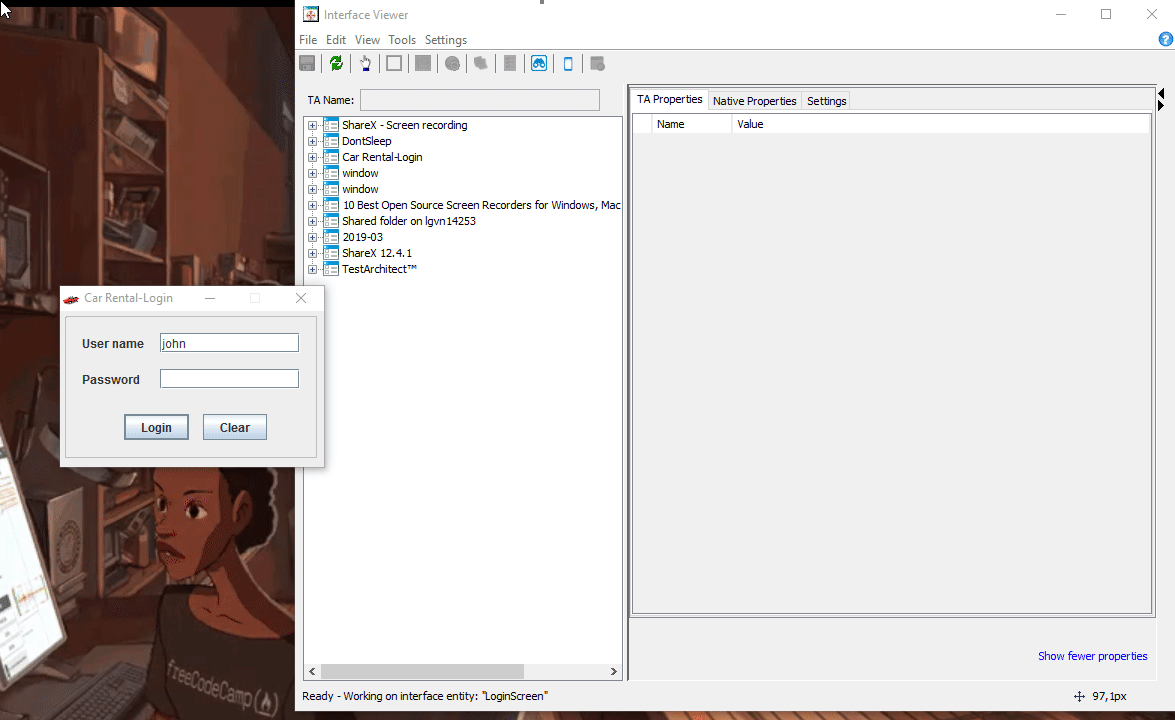
- Press F9 or click the Execute button on the Execute dialog to run the test module
- You'll see that the Car Rental program, specifically its Login dialog will popup
That's good! Now you can keep this Car Rental app running and return to TestArchitect IDE.
Capture the GUI controls
To start automating the GUI of Car Rental, you must first tell TestArchitect how to find those GUI controls on the screen. To do so, follow the steps below:
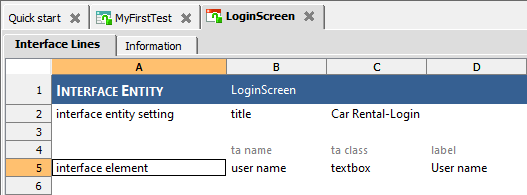
- Create a new interface entity and name it as
LoginScreenlike below
- Once the new interface entity is created, open the Interface Viewer tool from the toolbar
- Click the Hand toolbar button on Interface Viewer then click on the
User nametextbox to inspect its properties - Double click on the
User namenode to capture it
- After you click the Save button on Viewer's toolbar, the locator for this
User nametextbox will be stored in theLoginScreeninterface entity as below
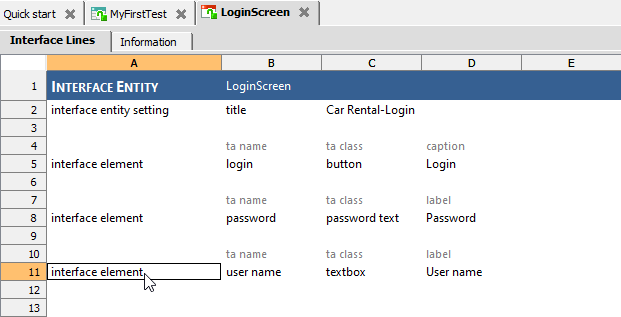
- Feel free to save this
LoginScreeninterface entity by pressingCtrl+S - Repeat step 3, 4 and 5 for the
Passwordtextbox and theLoginbutton - At this point, you should have 3 interface elements captured and stored in
LoginScreeninterface entity as below
- Check in the entity into Repository Server by pressing F11
TIP
This check-in step is very important! Please make sure you check in the entity before proceeding to the next section.
Now you have created your first interface entity.
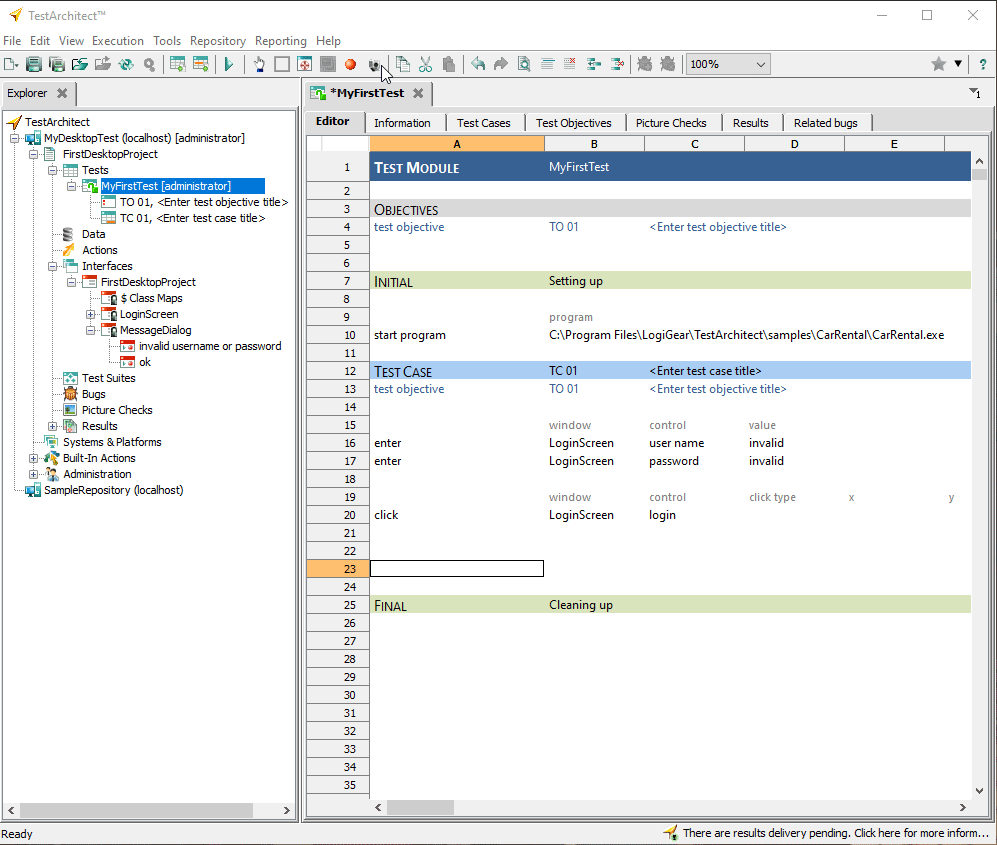
Write a test
We'll now create a test for the Login dialog of Car Rental desktop app. The goal of this test is to verify that a user with a wrong username/password pair cannot log into the system.
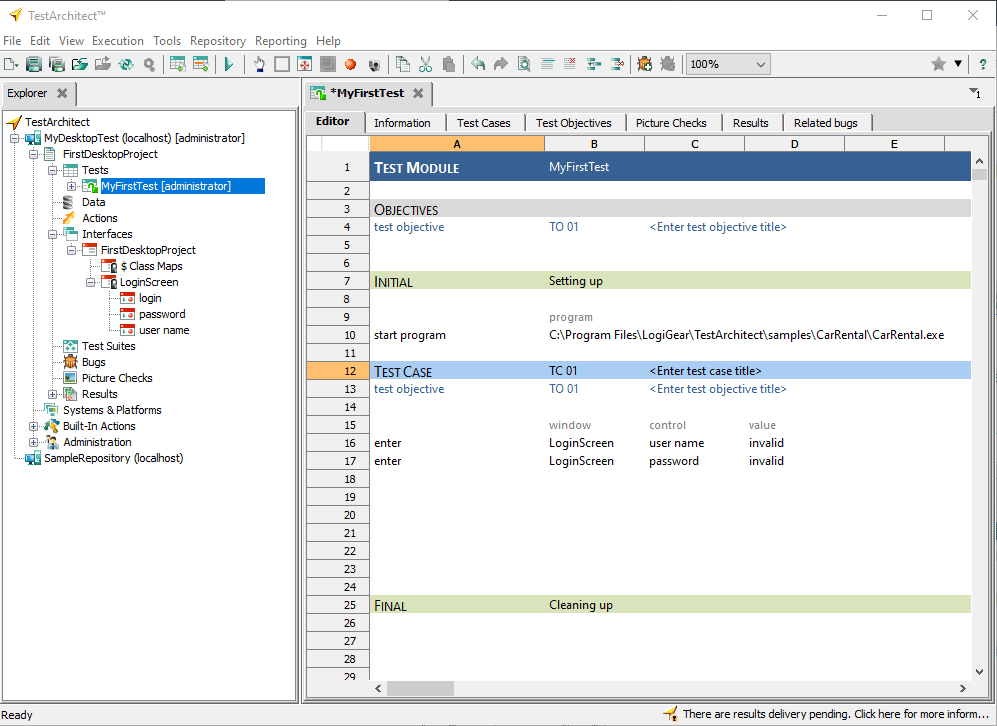
- After you check in the
LoginScreeninterface entity into Repository Server, you'll see the interface elements (UI controls) you previously captured on Explorer tree - Make sure that
MyFirstTesttest module is currently open - Drag and drop the
user nameinterface element on to Column A of the spreadsheet - TestArchitect automatically recommends that the most commonly used action for this textbox control is
enter - Select
enteraction then typeinvalidinto the value argument
- Do the same for the
passwordinterface element - Now drag and drop the
logininterface element on to Column A of the spreadsheet and selectclickaction
All precondition steps are in place. Now we need to add a checkpoint or assertion to verify the expected behavior.
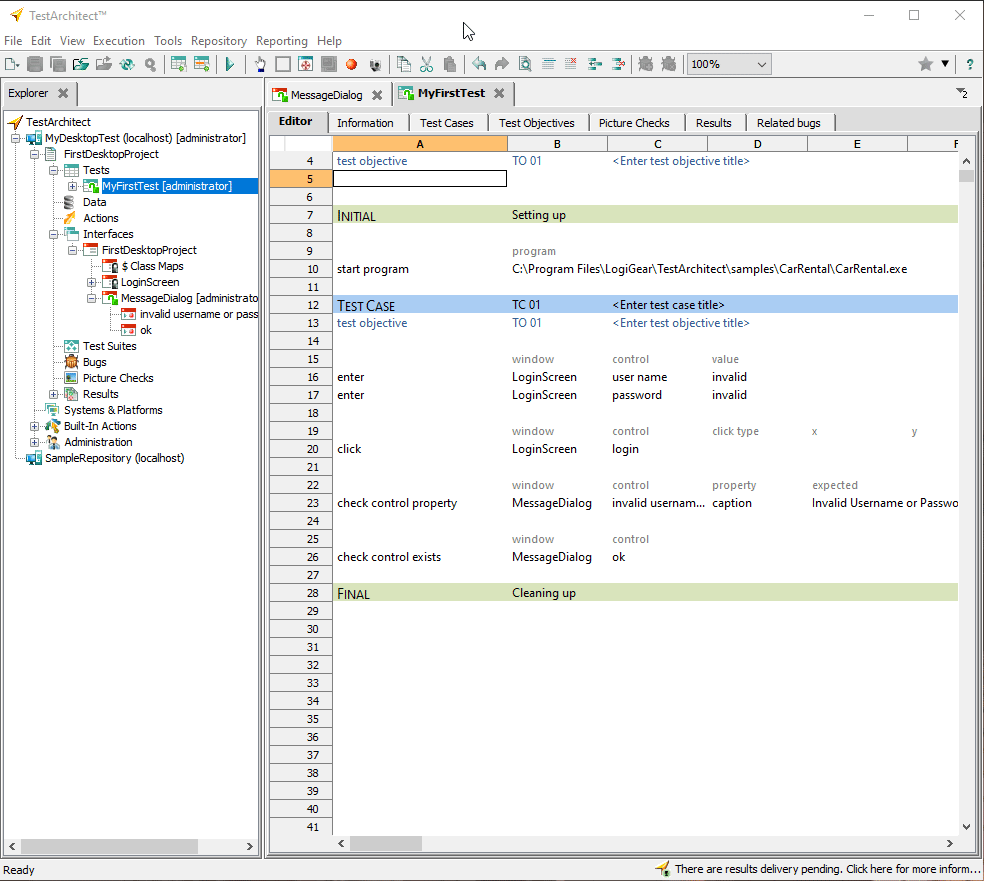
Create a checkpoint (assertion)
- Although we haven't added any checkpoint (assertion) yet, let's run the test to see what happens
As you might notice, the Car Rental app displays an error message saying
Invalid Username or Passwordand an OK button. This is an expected behaviorTo make sure that Car Rental always displays this correct message, we must capture the GUI controls on this dialog using Interface Viewer
3.1. Create a new interface entity and name it
MessageDialog3.2. Open Viewer and capture the GUI controls on the Message dialog (the error message and OK button)
3.3. Save the interface entity
MessageDialog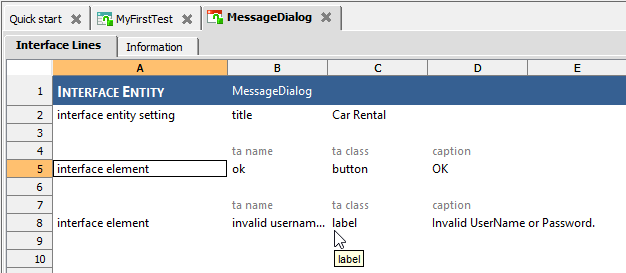
3.4. Check in by pressing F11
Go back to
MyFirstTesttest module, and do the following:4.1. Drag-drop the error-message (TAClass=label) into Column A of the spreadsheet
4.2. Select
check control propertyaction4.3. Type
captioninto the property argument4.4. Type
Invalid Username or Password.into the expected argument.
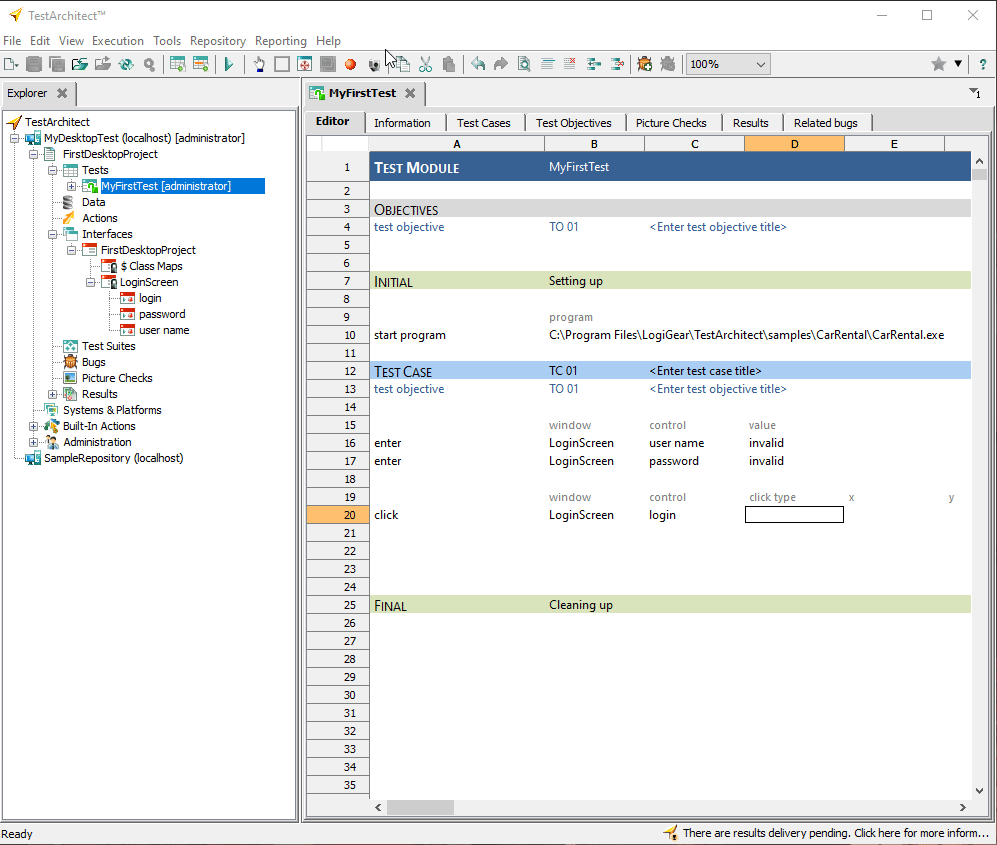
- Drag-drop the OK button from Explorer tree to Column A of the spreadsheet and select
check control existsaction - At this point, you'll have a test module similar to the script below
| A | B | C | D | E |
|---|---|---|---|---|
| program | ||||
| start program | C:\Program Files\LogiGear\TestArchitect\samples\CarRental\CarRental.exe | |||
| window | control | value | ||
| enter | LoginScreen | user name | invalid | |
| enter | LoginScreen | password | invalid | |
| window | control | |||
| click | LoginScreen | login | ||
| window | control | property | expected | |
| check control property | MessageDialog | invalid username or password | caption | Invalid Username or Password. |
| window | control | |||
| check control exists | MessageDialog | ok | ||
Now we've added the checkpoints and made the test more meaningful. Let's run the test.
Execute the test
- Click the Execute button on TestArchitect IDE's toolbar.
- Make sure that the Screenshot Recording feature is turned on.
- Click the Execute button on the Execute dialog and watch the test runs.
Once the test finishes, you'll see the test result automatically opened up.
Review the test result
- If you've followed the steps above precisely, you should see that the test has just passed.
- Click on View detailed results per test line to open the result details in a browser
- Expand the tree nodes to view the screenshots attached to each step.

TIP
The Screenshot Recording feature is a powerful secret weapon for reviewing what happened at runtime and debugging test failures.
Congratulations! You've completed the Desktop Testing Tutorial. Start applying what you have learned so far to automate more desktop apps. If you encounter any troubles or this guide is out-dated, please send us an email at support@logigear.com.